

Trim Area
Content in the three outer edges of the book might get trimmed off during the book making process. This is because the trimming process is not always exact so the area allows for production flexibility. In order words, make sure anything that's in this area is not crucial to the page (such as texts).
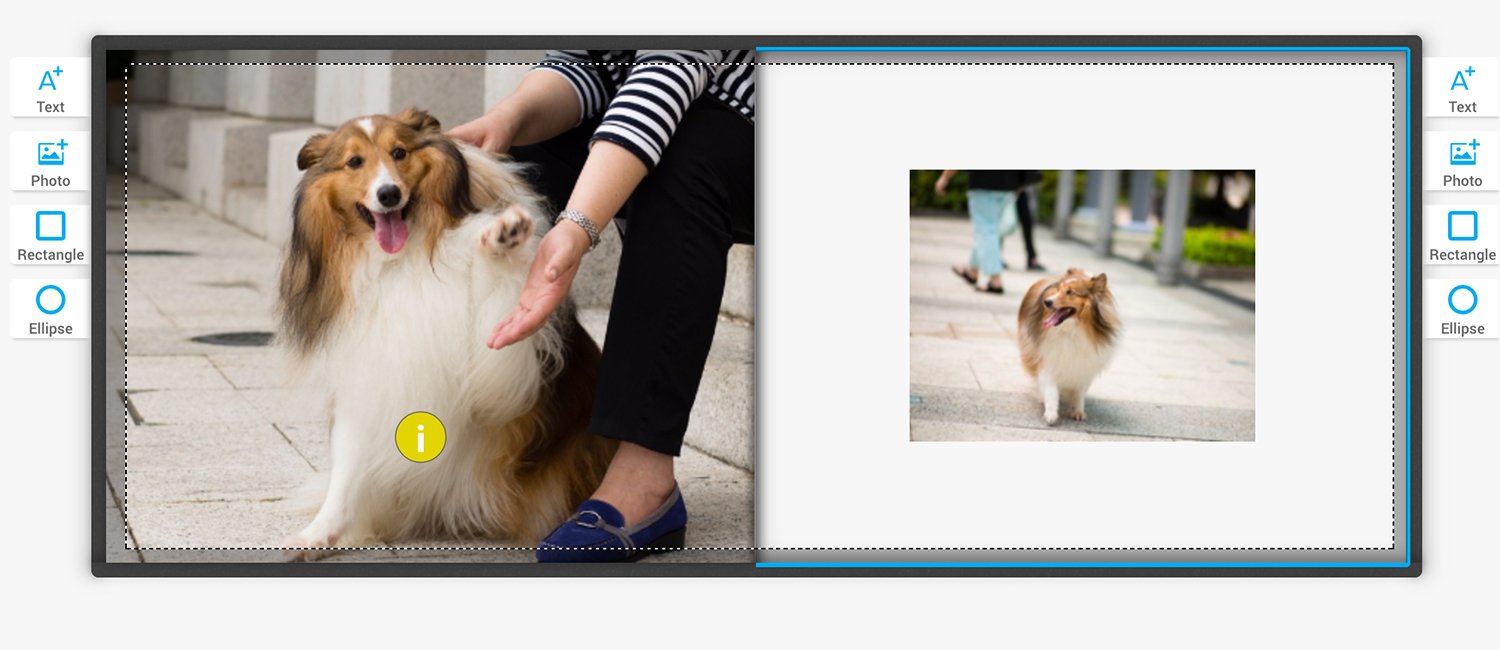
In order to print a full page to the edges, drag your photo entirely covering the grey area. In this case, little bit will be trim off but won't leave any white border behind.
If there's crucial content near the edges of the photo that you don't want any of it to be trim off then it's best to leave white border on all sides. Simply drag the photo to the inner edges of the grey area. So a good tip is to make sure all the sides (including the spine area) are clear of the trim area. Then there'll be white edges on all sides and won't crop any of your photo. This is especially important to leave borders to not cut the texts.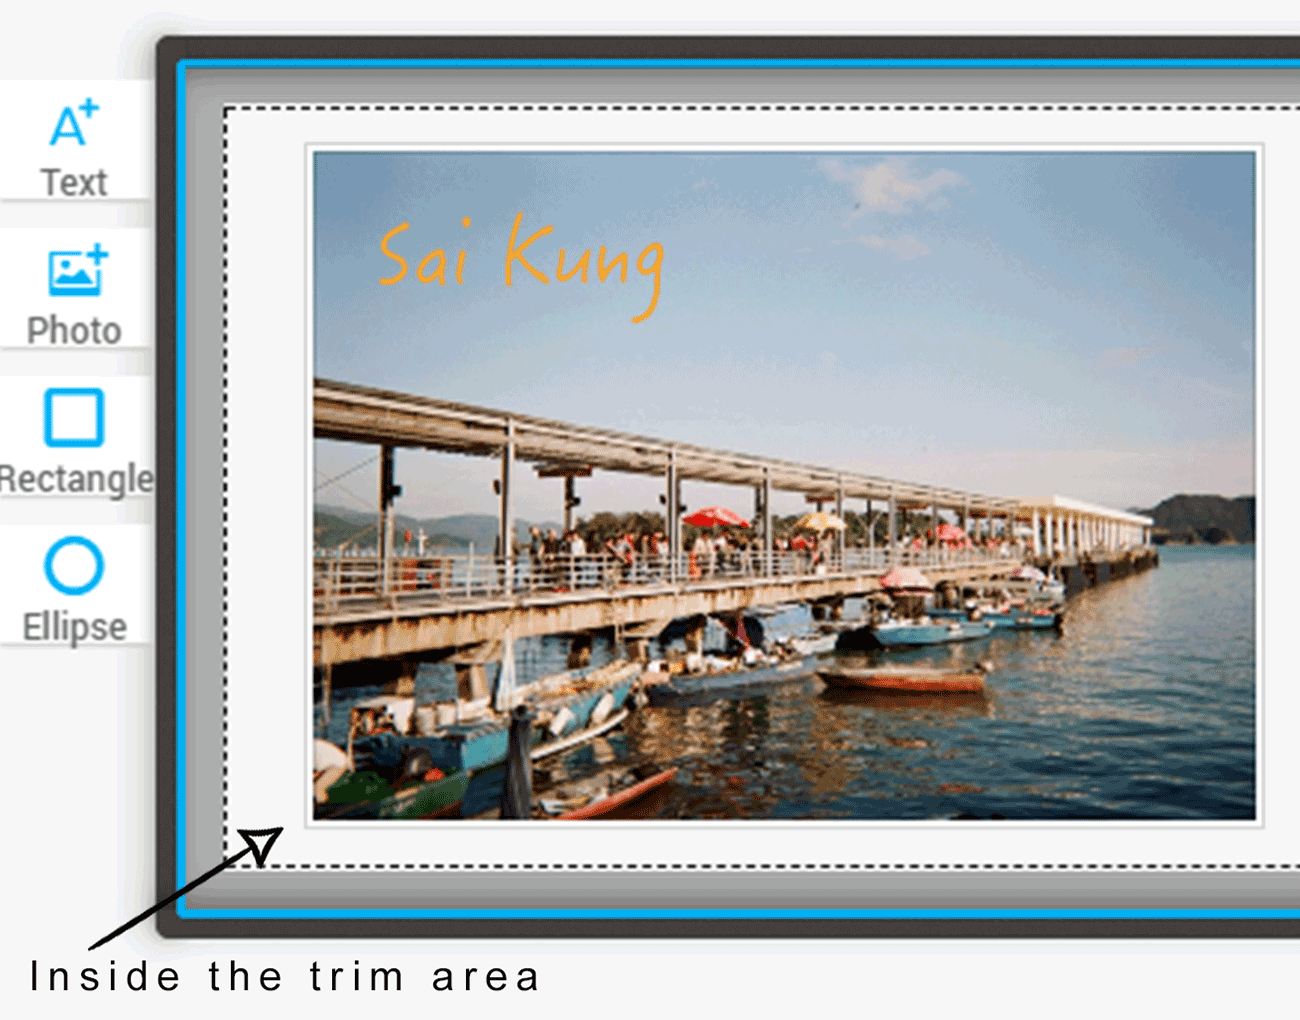
Since our books are binded together at the spine some content near the spine will get hard to see. Avoid placing important content such as faces, texts in these areas as well. Especially when doing a full spread page make sure no crucial contents are hidden in the spine area.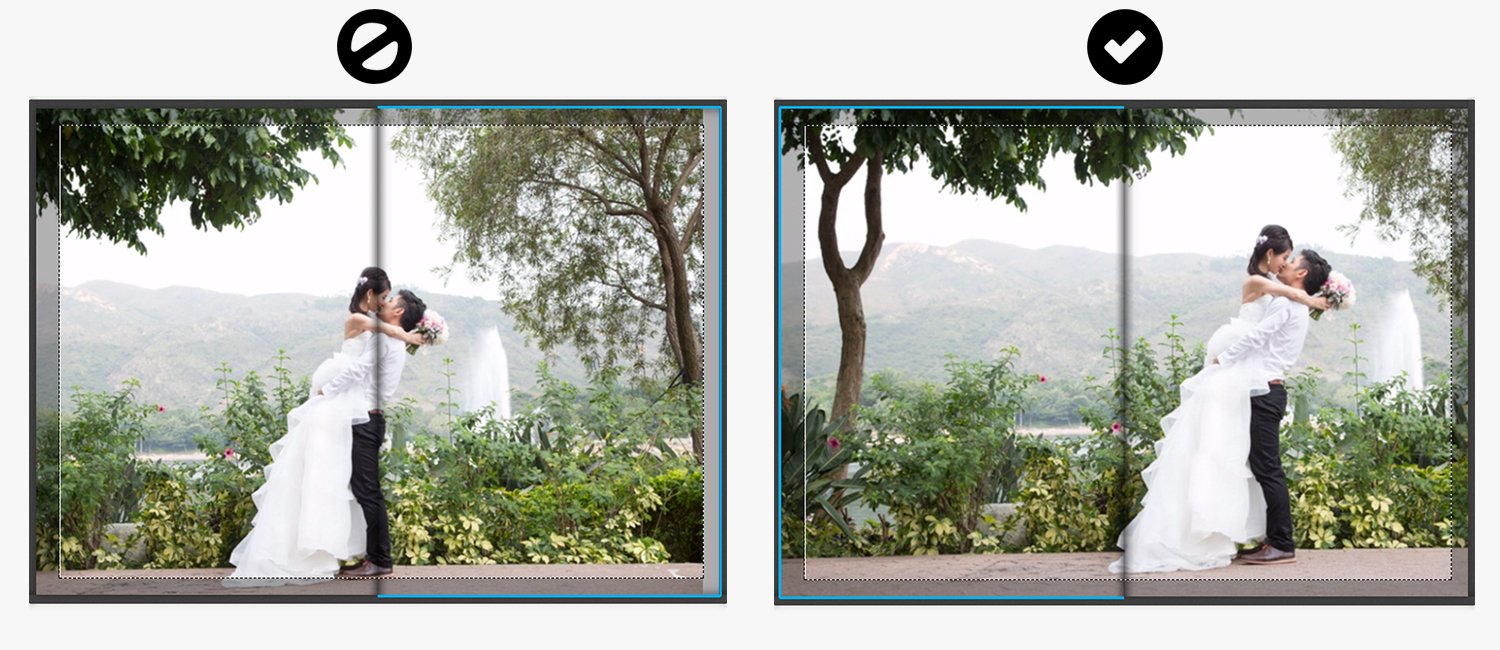
Image Resolution
Digital press printing is a printing method that produces a series of small dots to make up your image. It’s the reason why the DPI (Dots Per Inch) of the images you upload is so important – when the DPI is low (like 72 or lower), dots will be stretched as an image is printed, resulting in a grainy or blurry print. We use 300 DPI for the best print quality and the clearest prints.
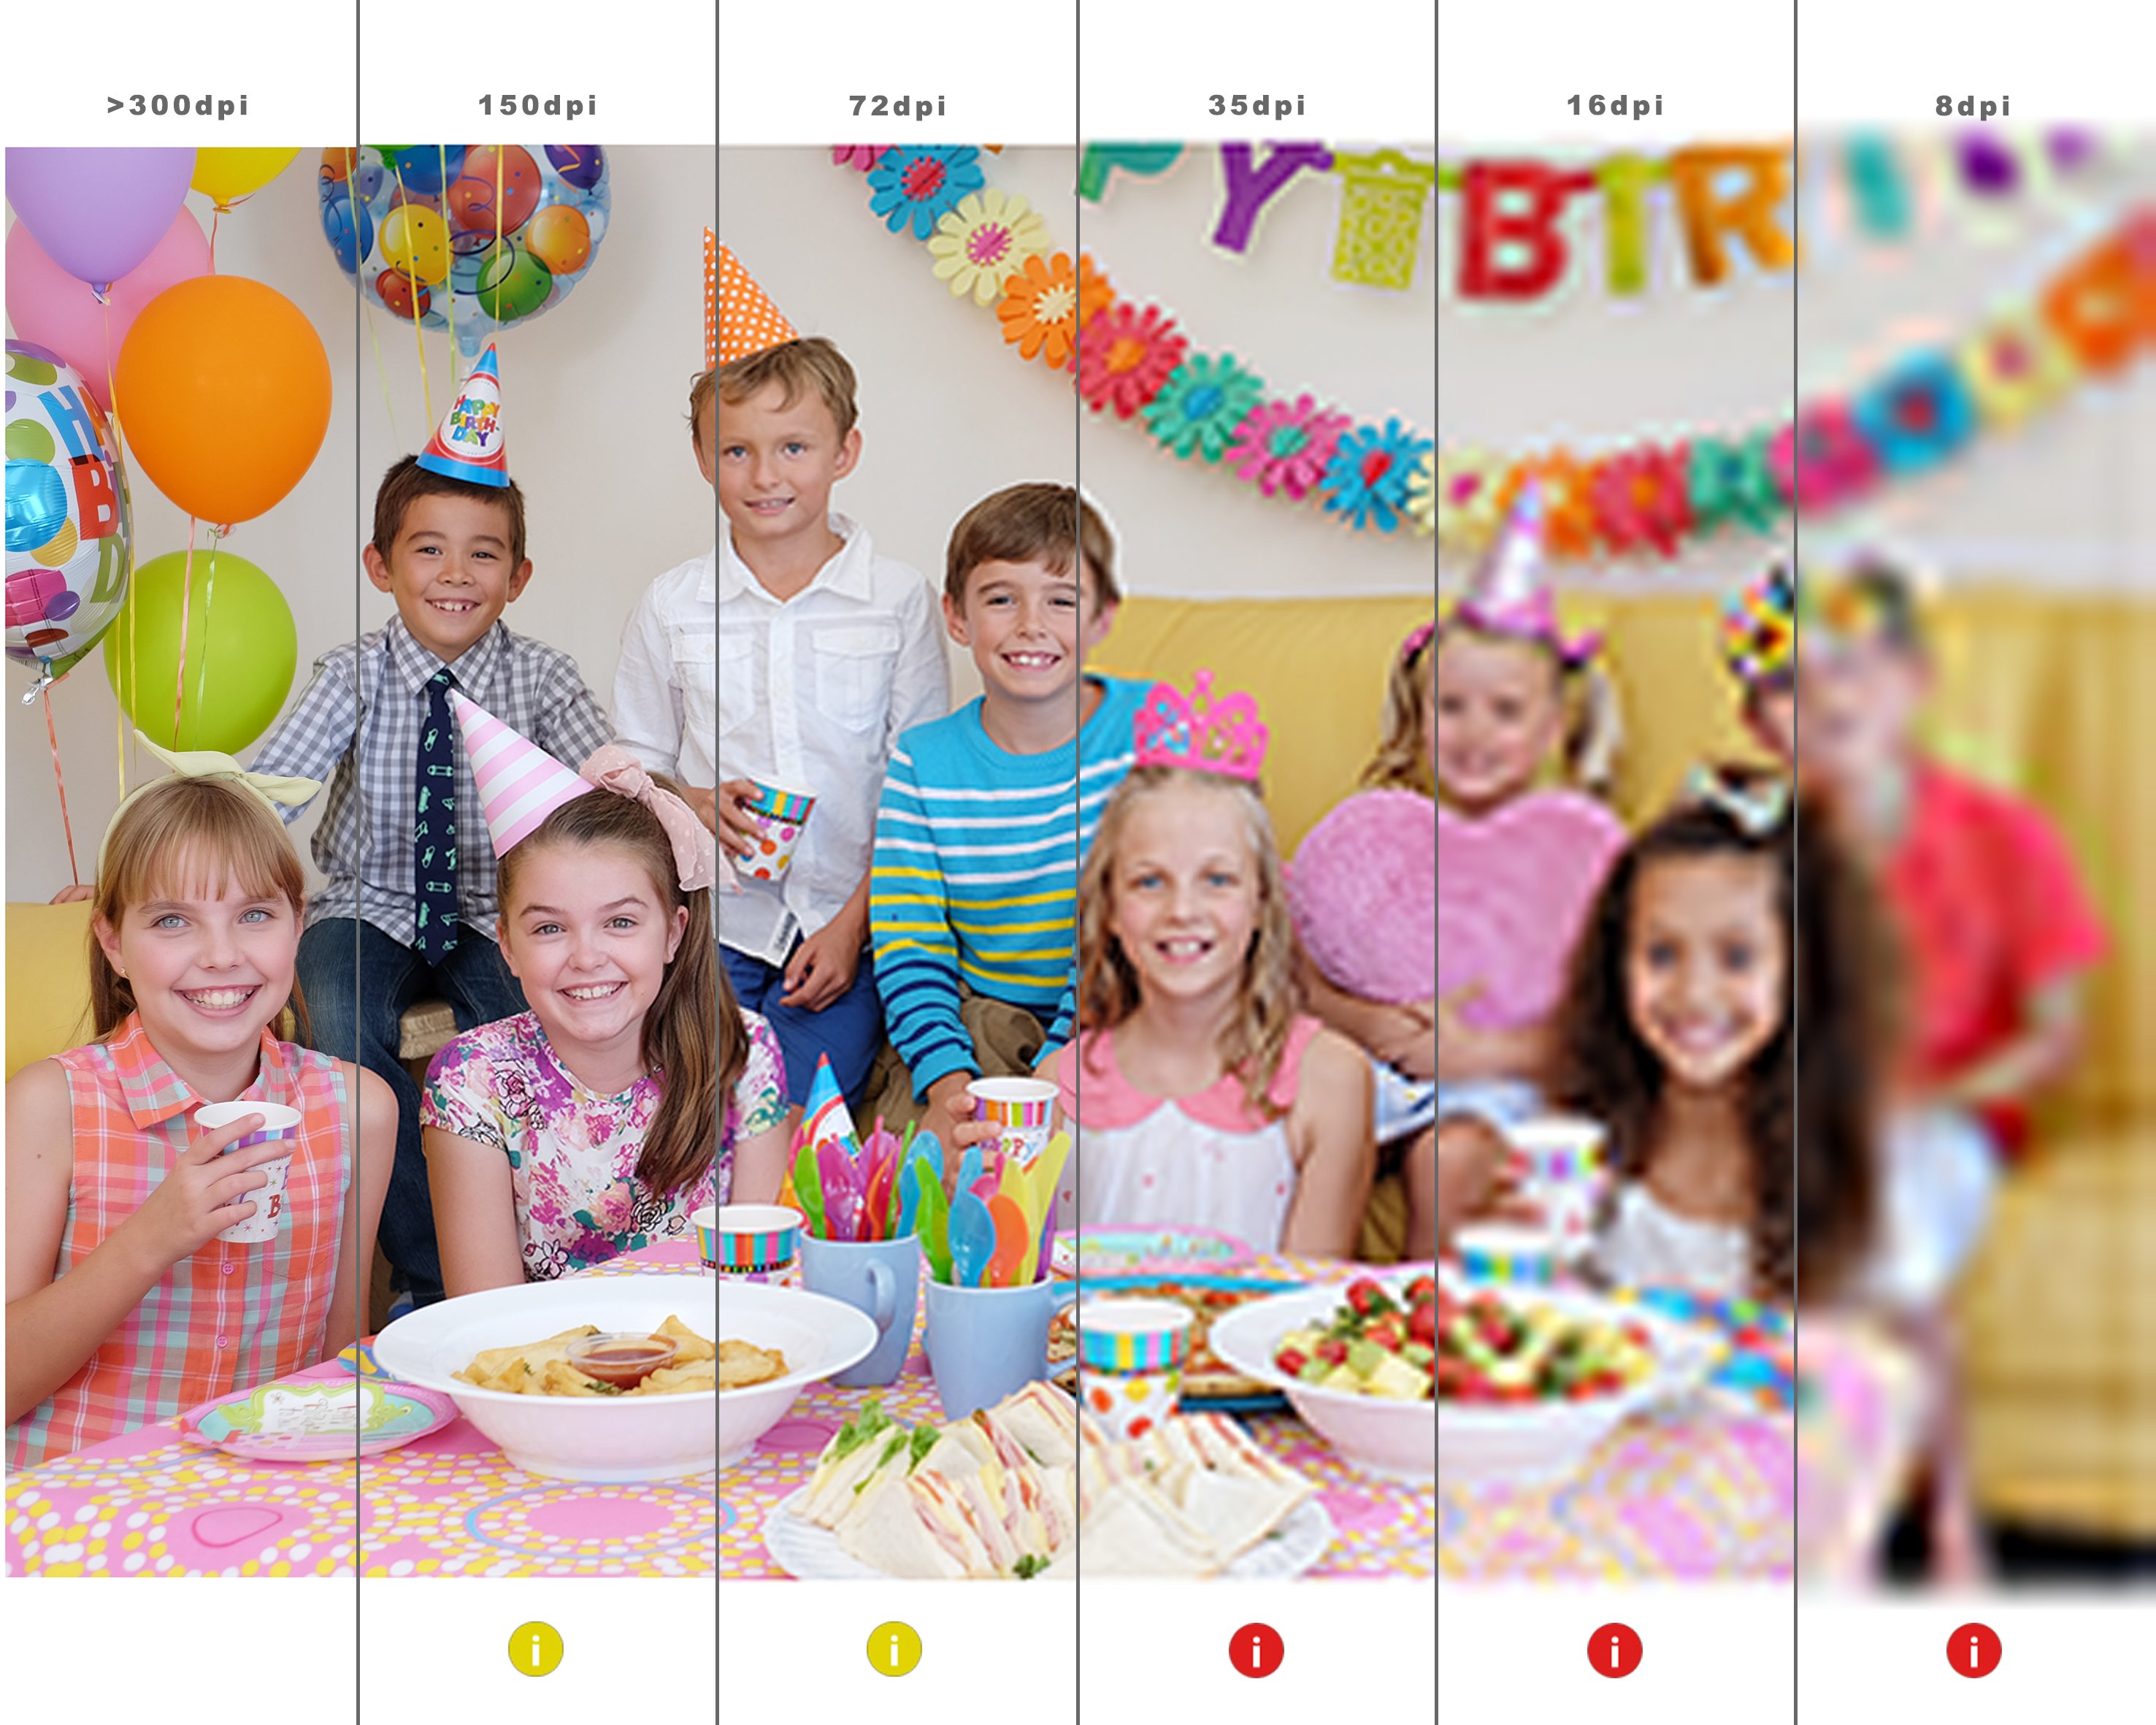
If the yellow warning lights up on the photobook editor, it means that your image doesn't have enough pixels to be printed at 300 DPI. It is still printable but the quality is not at the best possible. When the red warning appears, it means the image have a resolution of 72dpi or lower. At this point the image will have noticeable pixelation. We'll suggest either use a higher-resolution file or replacing with another image.
To get an idea of how the image will be printed out, you can zoom in to your image at the same scale/ size as the photobook to compare. For example, say you want to print a 28x35cm photobook then zoom in your image to around 28x35cm to see if the quality is acceptable.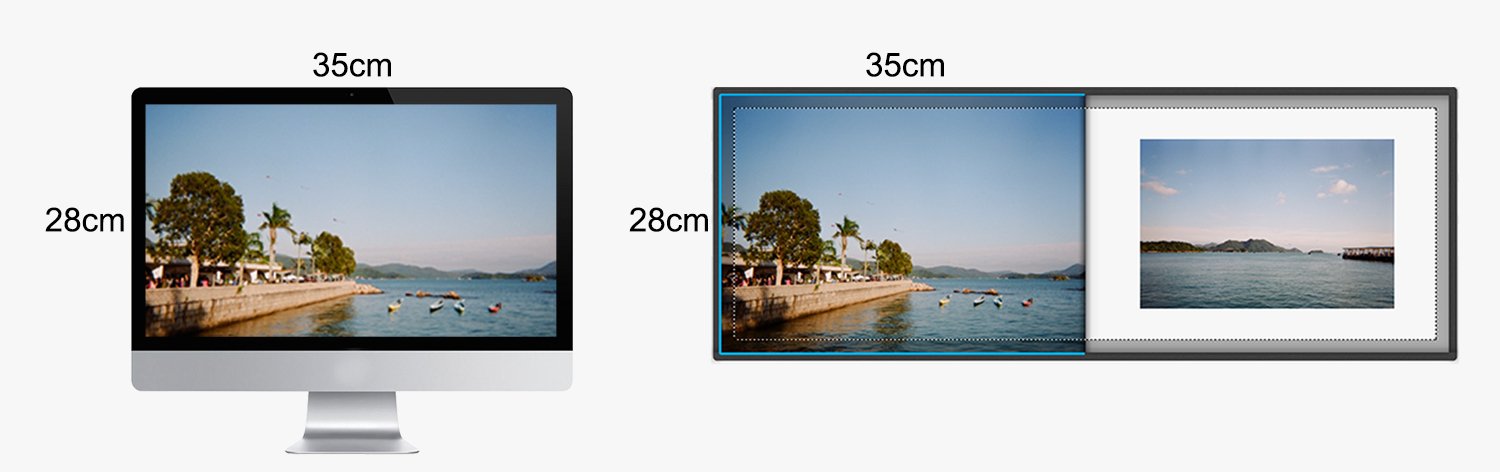
Relationship between dpi and pixels
If your image size is 1000px by 1000px, to be printed at 300dpi means that your image will be printed to 3.33x3.33inches (1000px % 300dpi = 3.33”). This means to print bigger than 3.33x3.33” the image will start losing in quality as it is being stretched bigger. Don't worry if the math is complicated or confusing, as long as the yellow warning doesn't show up then your image will be at 300dpi or greater. Or you can refer to this table for suggestions on pixel size for our different book sizes.
| Book Size | Best resolution (per page) | Best resolution (per spread) |
| 28x35cm | 3307x4134px | 3307x8268px |
| 20x25cm | 2362x2953px | 2362x5906px |
| 20x20cm | 2362x2362px | 2362x4724px |
| 15x21cm | 1772x2480px | 1772x4960px |
Nature of Printing
Here's a few suggestions to better compare photos view on screen than on prints. Basically, computer and phone screens are backlit, prints are not. Before uploading the photos, turned down the screen brightness to about 50%. This will help you get a better idea of how the print will turn out, and from there you can adjust the brightness of your images accordingly. Grainy or blurry photos will not print any clearer than what you see on your screen. In fact, they may actually print a bit grainier (because of digital press printing!). Consider replacing those images, or scaling them smaller to help condense the dots and print the image clearer. Also, color and contrast differs between ink soak in paper than on screen – for example, shadows will be more pronounced and neons may not pop quite as much. Hence the color/ contrast will be slightly different and is considered as normal.
Limited Warranty
We do our best to ensure our PhotoBook is the best quality possible in terms of material and workmanship. If you are not satisfied with your order, please drop us a note and we can make it right for you.
TinTinPhoto warrants that, subject to minor differences across products as described in TinTinPhoto’s Return Policy, photobooks will be free of any defects in materials and workmanship. TinTinPhoto will, at its own expense and at its sole obligation and your exclusive remedy, replace any defective Photobooks which you report to TinTinPhoto’s Order Support info@tintinphoto.com
Exceptions to Warranty
TinTinPhoto does not proof, edit or change any of the Content in the Photo albums and Photobooks that you post or submit for print services. As a result, the foregoing limited warranty does not include the obligation to correct (a) typographical errors, mistakes in grammar, unfinished text or other text errors; (b) low resolution images that may appear blurry in print; (c) design issues, including book format, organization, style, color and page layout; or (d) any other creative choices that you make related to the Photo album and Photobook. YOUR PHOTO ALBUM AND PHOTOBOOK CONTENT CANNOT BE EDITED ONCE IT IS UPLOADED TO THE WEBSITE. Therefore, you agree that you will not upload Photo album and Photobook Content unless it has been fully proofed and you are satisfied that it is ready to be published.
For the full term and conditions please visit here.